Editor's Notes: The Dottie Vintage Handbag sewing pattern mentioned in this photo tutorial is retired. The Betty Bowler Bag and Maisie Bowler Handbag both have a similar shape and style.
Also, this photo tutorial was originally written in 2014. A more recent video tutorial on how to make and use piping in bagmaking is available from Sewing Patterns by Mrs H:
Tutorial: How to Make & Apply Piping
by Alicia Miller - November 24, 2014

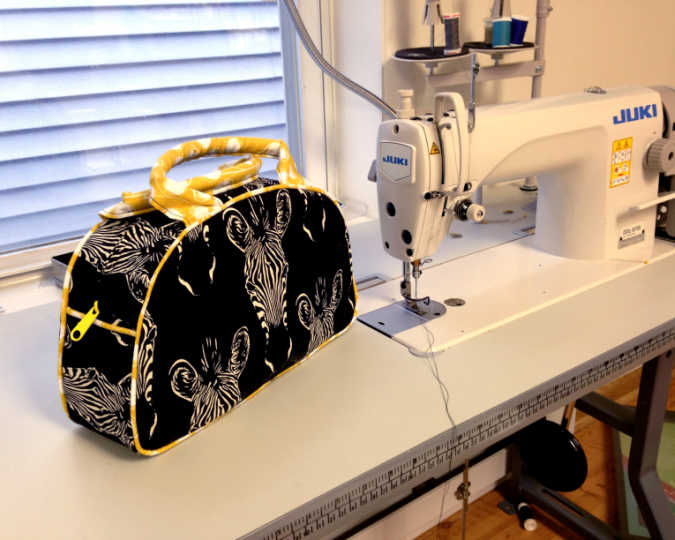
It seems a lot of people are intimidated at the idea of making their own piping or even using piping at all. After a lot of trial and error, I think I have a pretty easy method for both making piping as well as sewing it into a seam. This is a tutorial that will teach you how to create your own piping using the Dottie Vintage Handbag as an example. I usually use premade piping myself, it is cheap, saves time, and always looks fabulous in the end. If using premade, skip down to the "Sew Your Piping into a Seam" step.
Make Your Piping
You will need:
- 4/32″ or 5/32″ cotton cording,
- fabric,
- zipper foot,
- pins,
- thread
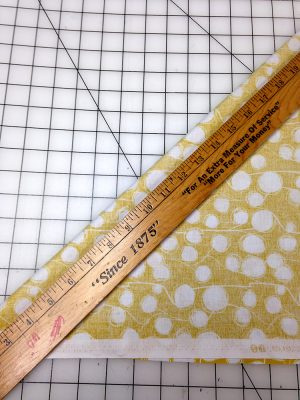
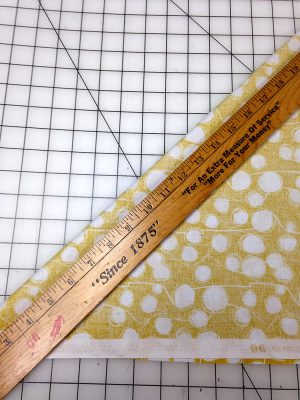
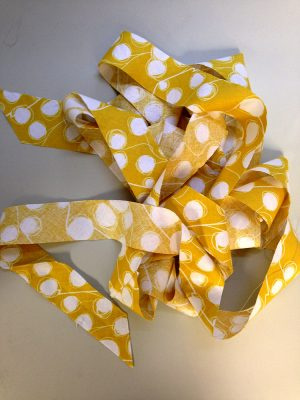
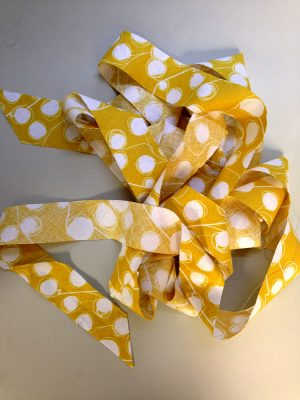
1. Cut bias strips.
Cutting strips on the bias of the grain allows it more flexibility and stretch around corners and curves.
Fold your fabric diagonally, matching the side edge with the bottom edge and press like so.
This will give you a 45 degree line to align your strips with.
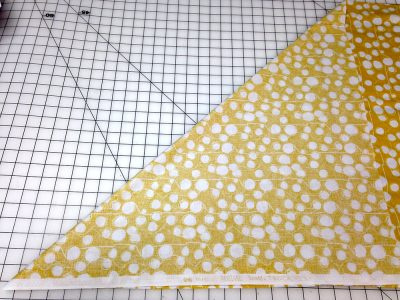
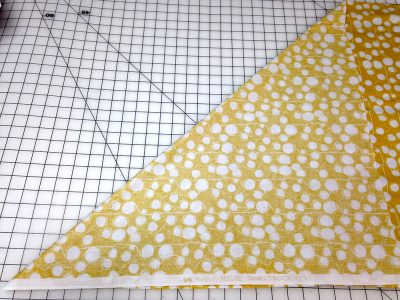
Cut as many strips as your project requires, parallel with the 45 degree crease you made.
For my patterns, I use 1.5″ wide bias strips, which ends up giving close to a 1/2″ seam allowance when sewn into the bag.
2. Connect bias strips.
We need to connect our bias strips to form one big long strip.
Pin two strips right sides together at a 90 degree angle.

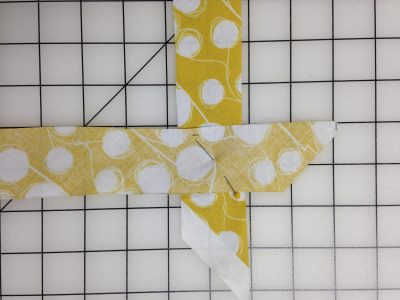
Sew a straight line from the top left corner of where the two strips overlap, to the bottom right corner.
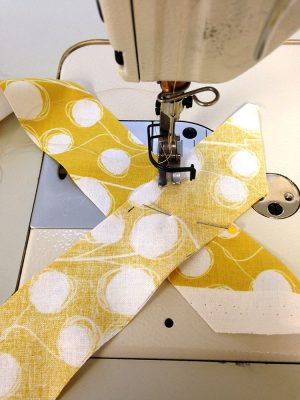
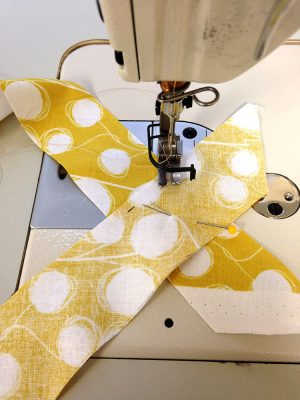
Trim the seam allowance.
Repeat to sew all the strips together to form one long strip of bias tape.
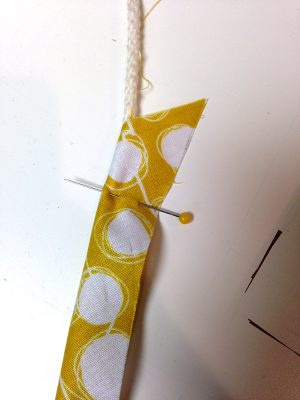
3. Sew the cording inside.
Starting at one end of your bias strip, lay your cotton cording on the wrong side of your bias strip and fold overtop in half.
Slide a pin through the folded strip, and through the cotton cording, securing both.
Work your way along the bias tape, folding & pinning the cording inside, maybe every 8″-12″ or so.

4. Sew piping.
Put your machine’s zipper foot on and adjust your stitch length to the longest setting.
Starting at one end of the piping, stitch along the cording to encase it in the bias tape.
It may help to move your needle to the left.

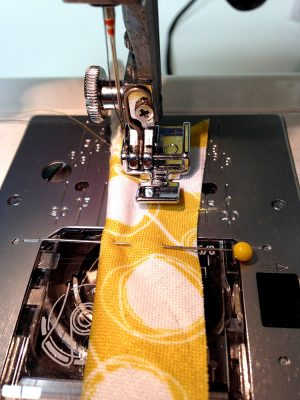
We don’t want it super tight, we will be sewing a closer seam later to tighten it up.
Keep your stitching as uniform as you possibly can, this will ultimately be the guide we use in the end.
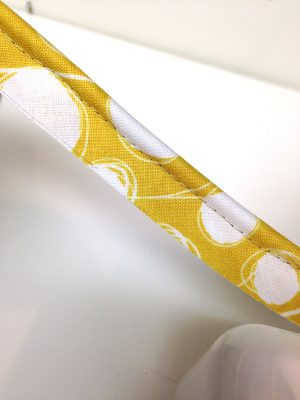
Now you have your very own handmade piping!
It should look something like this when you are done.
You want to use a thread that matches the bias tape.

Sew Your Piping into a Seam
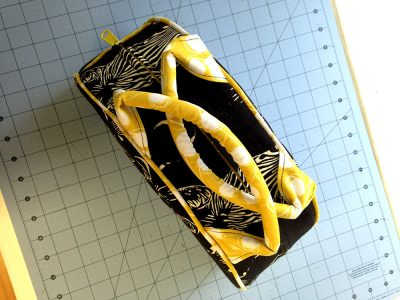
We need to pin and machine baste the piping onto one of the pieces you will be sewing. In this case, I’m attaching the piping on the main panel of the Dottie bag before I sew it to the gusset (placing it in between them in the seam).
If you were making a pillow, for example, you’d pin and machine baste piping to all 4 edges of one of the square pillow panels before sewing it to the other square pillow panel.
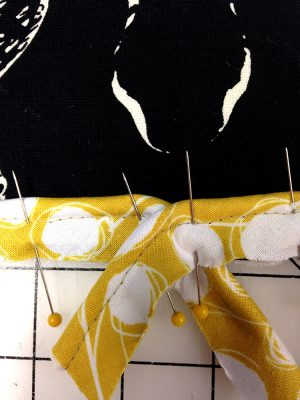
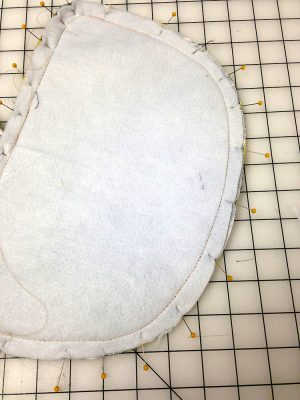
5. Attach piping to panel.
For the Dottie main panel, I pressed it in half to give me a center crease.
Starting in the bottom center of the panel and leaving about 1″ of piping hanging off the piece, match raw edges of piping to raw edges of main panel and pin.
You want to make sure the basting in your piping is about 1/2″ in from the raw edge of the main panel. This way, if your bias tape isn’t sized perfectly, your bag still will be once sewn together.
If using premade piping, it’s usually more narrow, so you’ll have to set the piping raw edge in from the main panel – still matching up the stitching in the piping with 1/2″ from the raw edge of the panel.
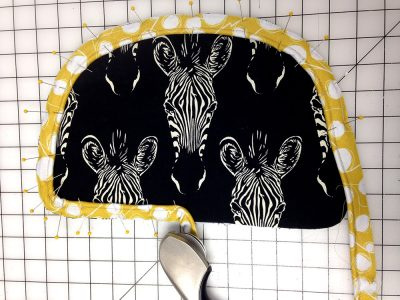

With these kinds of curves, you can never have too many pins!
Match the raw edges as exactly as you can, especially around the tighter curves.
If you have trouble getting the piping to turn easily around the curves, or need to do a 90 degree corner, you may clip the piping about 1/4″ in from the raw edge.

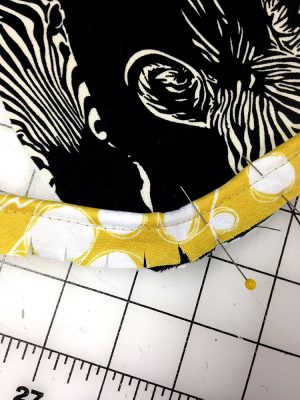
When you get back where you started, at the bottom center, overlap the piping as shown, and let 1″ of the end hang off the piece.
The overlapping piping at start/end won’t be seen much being on the bottom of a bag.

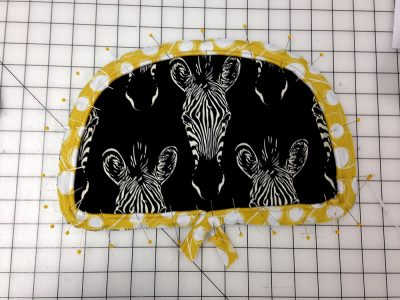
At your longest stitch setting and with your zipper foot, start wherever you’d like and sew right along the same stitching you created when you made the piping to baste the piping to the main panel.
When you reach the “overlap” at bottom center, stitch straight across (and through) the piping.
Turn your piece wrong side up and you can see the machine basting stitching you just made.
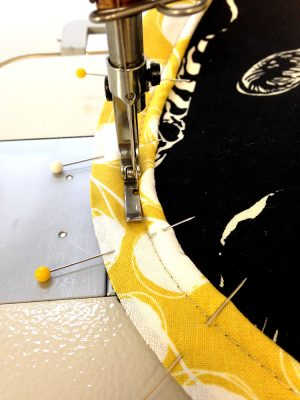
6. Sew piping into seam.
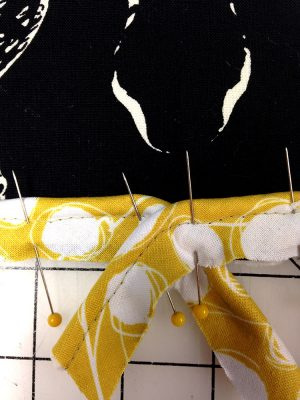
Now pin your pieces right sides together (for the Dottie, it’s pinning the main panel to the bottom/top zippered piece) with the piping sandwiched in the middle.
Match all raw edges together.
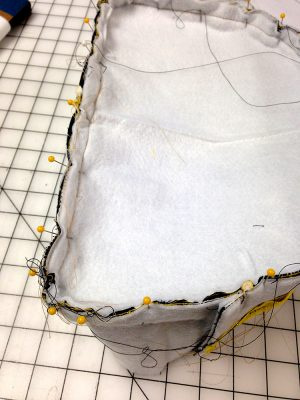
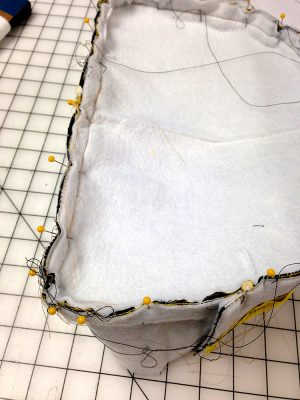
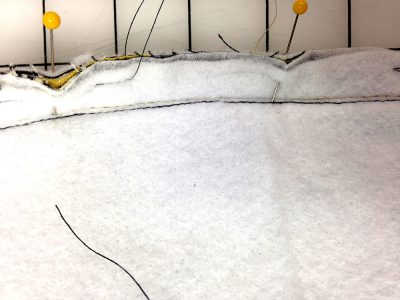
With the wrong side of the panel that you basted the piping to facing up, switch back to your regular stitch length (2 for me), and sew right INSIDE the line of stitching you can see.
This will get the piping nice and tight.

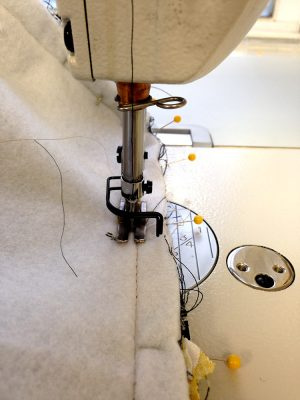
Your stitching should be where the black is in the photo below, *just* inside the basting stitching you added earlier (the beige in the photo).
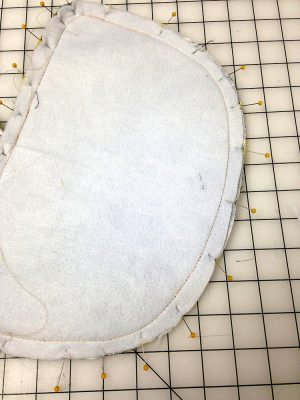
Now turn your bag right side out and look at your piping, and feel the entire way around.
There may be spots that need to be tightened up a bit, just turn wrong side out and sew a little closer in that particular spot.
You’ll get the feel of it pretty quickly.
With your bag right side out, try marking the “loose” spots inside so you know where to sew closer when your bag is wrong side out.

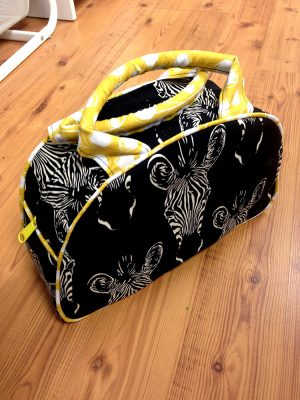
Once the piping is how you want it, trim the seam allowances, press your bag, and admire your piping!
You’re all done!
Unless you’re making Dottie, in which case, you get to do it all over again with the other side.

Comments from bagineers:
Colleen, "Thank You for doing one of the best tutorials I've seen on making your own piping!"
Ellen, "Making fitted slip covers for my couch and your piping instuctions were so helpful. Thank you!"
Josephine, "Excellent. You made it look so easy including the curve on the bag and how to run the piping along the seam. Making the piping was well illustrated and looks less of a challenge than I thought. Thank you."
Anne, "Fantastic! thank you so much"
Tracey, "Is there a way to have piping start at the top edge of the bag and run the side, bottom, and back up the other side (piping ends never meeting)?"
Editor's note: You may find Mrs H's Masterclass videos useful for this! Click here to watch 'How to use piping in bagmaking' from Sewing Patterns by Mrs H
Diana, "You did a great job with this tutorial. I am now making my own piping! I did look at other tutorials, however yours is the one I used to make my first piping."
Louise, "I was amazed at how easy this was to do. Great tutorial"
What did you think of this tutorial?
Do you have a follow-up question about making and using piping?
Send us an email! >>> swoon@mrs-h.com