Zip Around Pearl Wallet Tutorial From Diedel*Bug Handmade
Hey everyone! Erin of Diedel*Bug Handmade here. I got a crazy idea and decided to make our sweet Swoon Patterns Pearl Wallet Clutch into a zip around wallet!
I’ll stop the teasing you now and get on with the tutorial. First things first, you need to swing by and grab your copy of the Pearl Clutch Wallet Clutch Pattern here

Pearl is already super awesome as she is but we’re going to take to the next level. Let’s get started. You will need only the bifold pattern pieces (numbers 5, 7, 8, 11 and 13). We will also need the card slot (#9) but will be cutting at 3” x 32” instead of the measurements listed in the pattern.
There are two additional pieces we will need, they are for the new interior zipper pocket. For the zipper pocket, cut 1 exterior, 1 lining and 1 woven interfacing at 3.5” x 8”.
For the main zip around zipper, you will need a 20” or longer #5 handbag zipper or any zipper with at least a 1.25” zipper tape. We will also need an 8” (or longer) all-purpose zipper for the interior zipper pocket. Cut the pattern pieces as stated in the pattern; the card slot panel (3" x 32") as well as the additional zipper pocket pieces. For panel #8 (the bifold stabilizer), lay on the wrong side of the main bifold panel. We need to trim the straight edge so we have a 3/4” gap between the two stabilizer pieces. Then, cut an additional piece of stabilizer 1/2” x 7” to place in between.
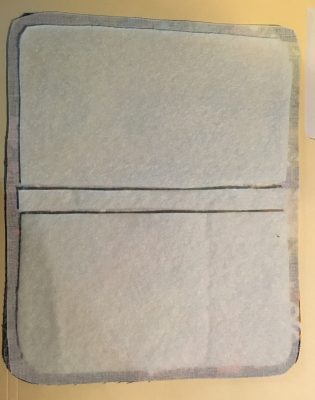
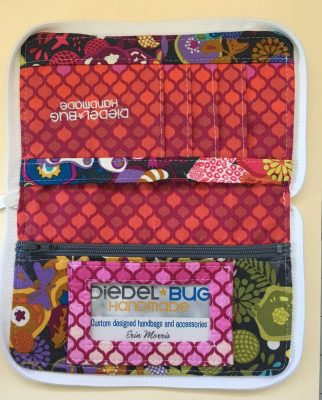
Fuse all interfacing and stabilizer as directed in the pattern. Here are the pieces you should have:

Time to sew! We can skip to step #3 of the pattern, Card Slots. Construct the Bifold card slot panel as instructed in the pattern; EXCEPT baste at 1/8” instead of 1/4”.
This is what you should have now.

Set aside.
Next we will be constructing the zipper pocket. Lay your interior zipper pocket lining right side up and lay your all-purpose zipper on top, right side up.
The zipper pull direction depends on your preference in the way the zipper pocket opens (I put mine on the right).
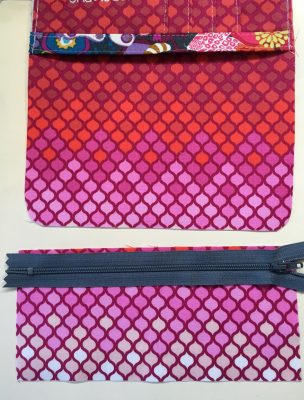
Pin and baste the pocket zipper to lining. Now, lay a zipper pocket exterior right side down and sew with zipper sandwiched between at 1/4” seam allowance. Press both away from zipper and topstitch along the zipper. Set aside.
Take the lining main bifold panel with attached card slots, measure and mark 3.25” from the opposite end of the card slots.

Lay zipper pocket right side down with raw edge of zipper lined up with the mark. Sew on with a 1/4” seam allowance.
Now flip the zipper pocket down, so the right side is up and baste the three raw edges at 1/8”. This is what you should have now:
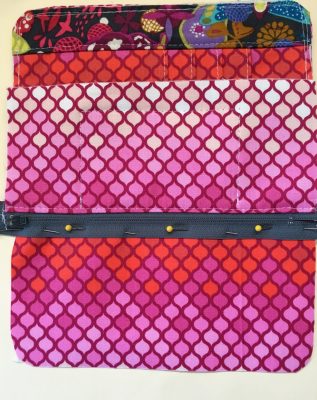
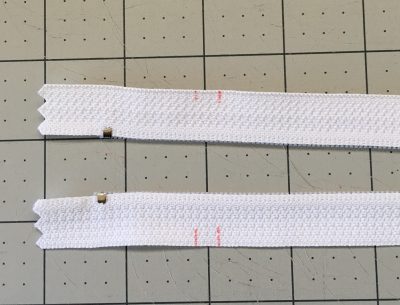
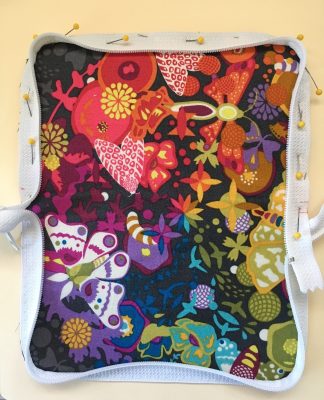
Now comes the FUN part! Please note the sarcasm lol. Take your handbag zipper and lay right side (zipper pull side) down. At the open end make 2 marks. One at 1” and one at 1.25” from the metal zippers stops on each side.
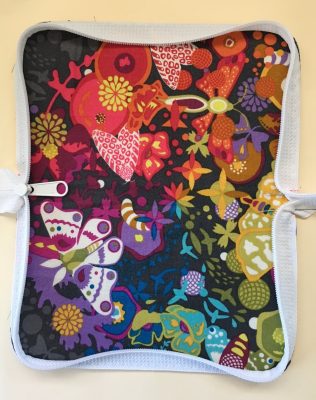
Take your exterior main bifold compartment panel and mark the center of both long edges on the right side. You can either use an erasable pen or fold and crease. Unzip the zipper completely, match your first mark (the 1”) on the wrong side of the zipper with the center mark on the right side of the exterior. Carefully pin the one side of the zipper right side down with the zipper teeth facing to the middle to the exterior. You should have a 1-2” “zipper tail” at the end. Make a mark 1/4” from the center mark on the exterior on the back side of the zipper. This will be where you end your stitching. Be sure not to pull and stretch your zipper or it will end up wavy. If you have trouble around the curved corners make tiny (just less than 1/8”) snips in the zipper tape. Starting at your second mark (1.25”), pin and baste zipper to exterior at 1/8” seam allowance ending at 1/4” from center at the closed end.
Pin the open end tails of the zipper that you just basted out of the way. Repeat pinning and basting of the remaining free side of the zipper. Be careful not to get it twisted.
Now, make sure your zipper pull is pointing to the interior or you won’t be able to get it out once complete, *cough* ask me how I know. Haha!
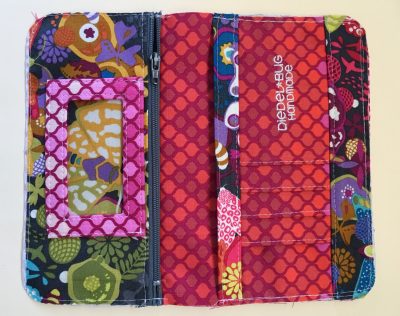
Take your completed bifold lining, move the lining zipper pull to the middle so it doesn’t get in the way. Fold to mark center of long sides of lining on the wrong side. Mark 1/4” from center on each side. Lay bifold lining face down on top of the exterior, make sure the open end of the card slots point to the open end of the zipper.
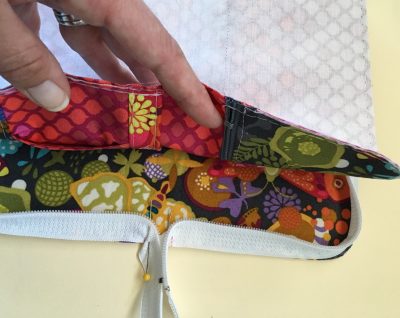
Pin the one side of the lining with the zipper pocket to exterior. Go slow, use your fingers to smooth the zipper at the corners and sew with a 1/4” seam allowance from your 1/4” mark to the 1/4” mark at the opposite end. Now, I would turn it right side out and pop the corners out to make sure you didn’t catch the zipper wonky in the seam.
If the zipper is wonky, rip your stitches out and correct. If it looks good, turn back inside out and repeat with remaining side but leave at least a 5” hole for turning, making sure to backstitch well on each side of the hole.
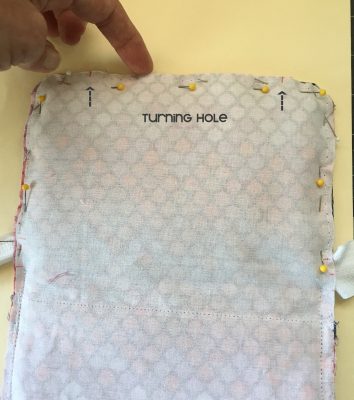
Again, pop the corners to the right side and check that the zipper didn’t catch funny. If it looks good, clip the corners.
{Editor's note: The image that should be here has gone wandering - a note about this has been added to the team's task list}
(I used my pinking shears)
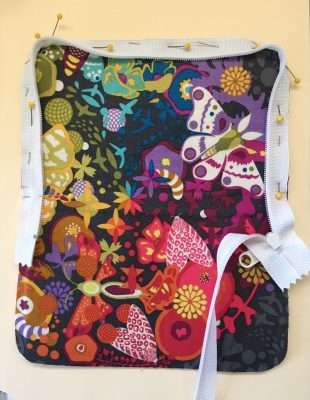
Turn right side out through the hole. Press seams around the zipper, tuck in the raw edges of your turning hole 1/4” and topstitch.
If your machine won’t go over the zipper ends just start and stop as close as you can.
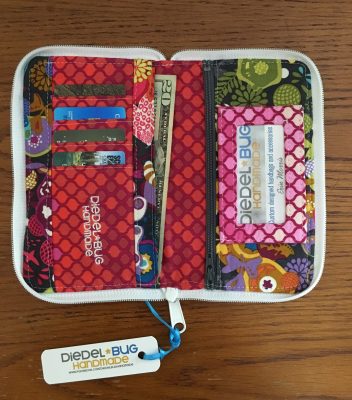
Now step back and admire your GORGEOUS new Pearl zip around wallet! Congrats! You did it!

You may also like: