No More Saggy Linings!
written by Alicia Miller; June 10, 2015 #BagMakingTips
Anyone familiar with Swoon patterns is probably aware of my affinity for drop-in linings. If you have no idea what I’m talking about, you can read all about my love affair (and drop-in linings) here.
Over in the Swoon Patterns Group on Facebook, Sharon Mallory posted this awesome trick to tack the lining to the exterior at the top gusset seams of bags with a drop-in lining.
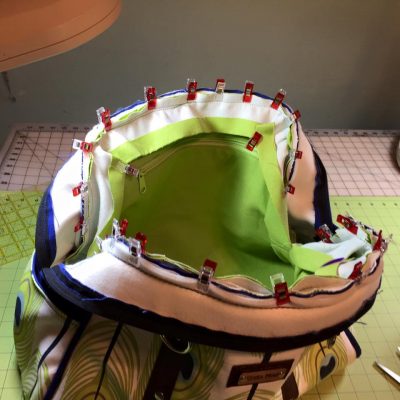
Sharon is making Vivian in her photos below. Here you can see the two straight top seams (the top straight edges with piping).
You just sew your bag like usual, exterior separate from lining until they are both finished and ready to be sewn together. Then do NOT trim the seam allowances along the top edge of the bag (parallel to the zipper), on either the exterior or lining. You can still trim them down the sides and along the bottom to reduce bulk.
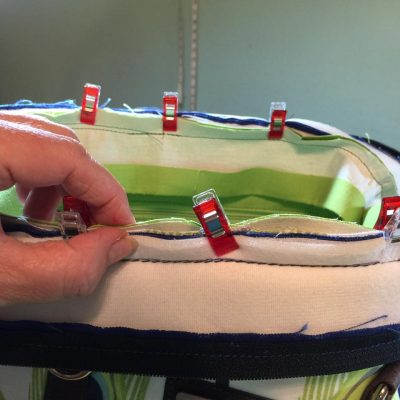
Then, drop the lining (wrong side out) inside the exterior (right side out) and match up the lining top seam allowance to the exterior top seam allowance along both sides of the bag.


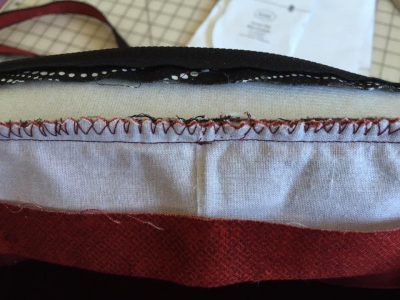
Sew with a zig zag stitch through both seam allowances, attaching the lining seam allowance to the exterior seam allowance. Be sure to keep the tops of the gusset with zipper/opening out of the way. You only want to sew through the seam allowances here.

Once the seam allowances are sewn together, continue to sew as per the pattern instructions, top stitching along both sides of the zipper to finish sewing your lining inside the exterior.
What a wonderful trick to keep the linings tacked up to the top seams of the bag. Thanks Sharon!
Editor's Note: This is a mirror of a blog written by Swoon Patterns founder and designer, Alicia Miller, in 2015. For the most up-to-date bagmaking tips and advice, please join us in our Swoon Fans community on Facebook. Thank you.

